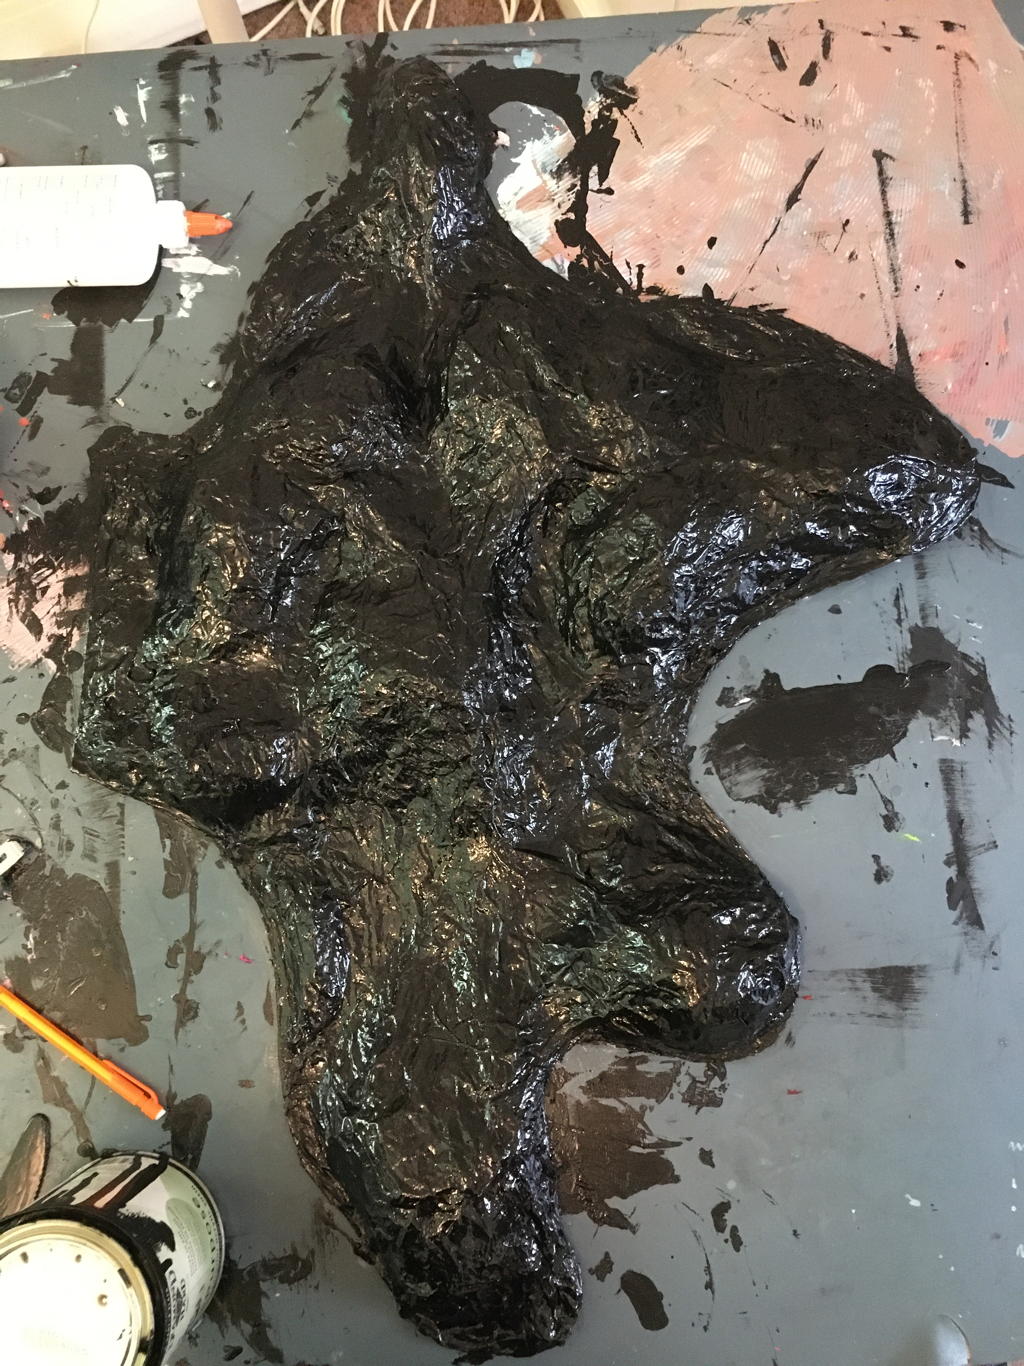
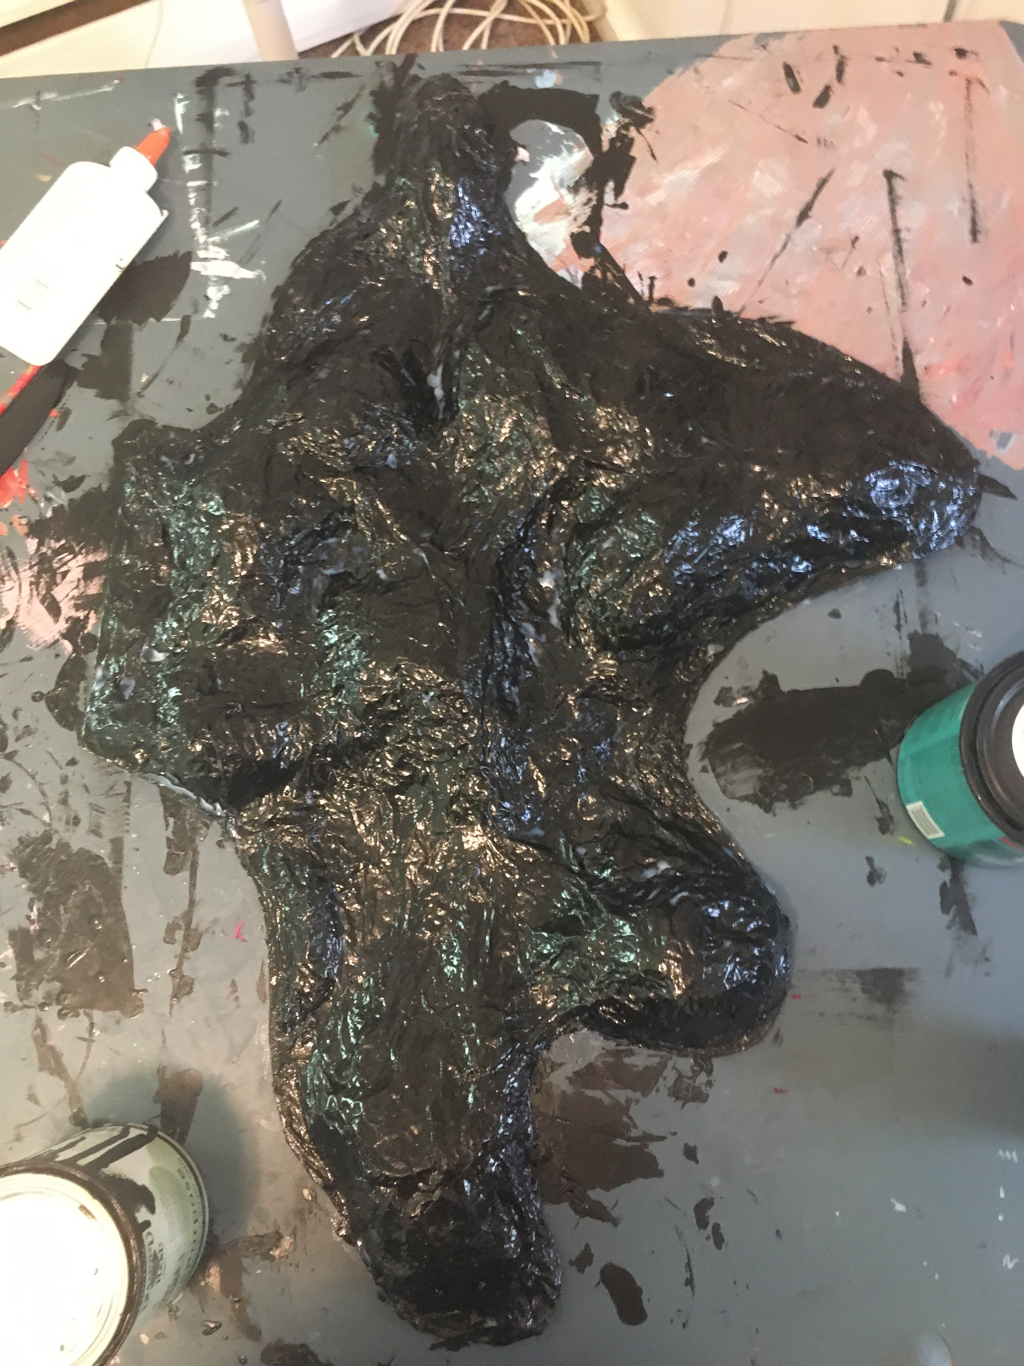
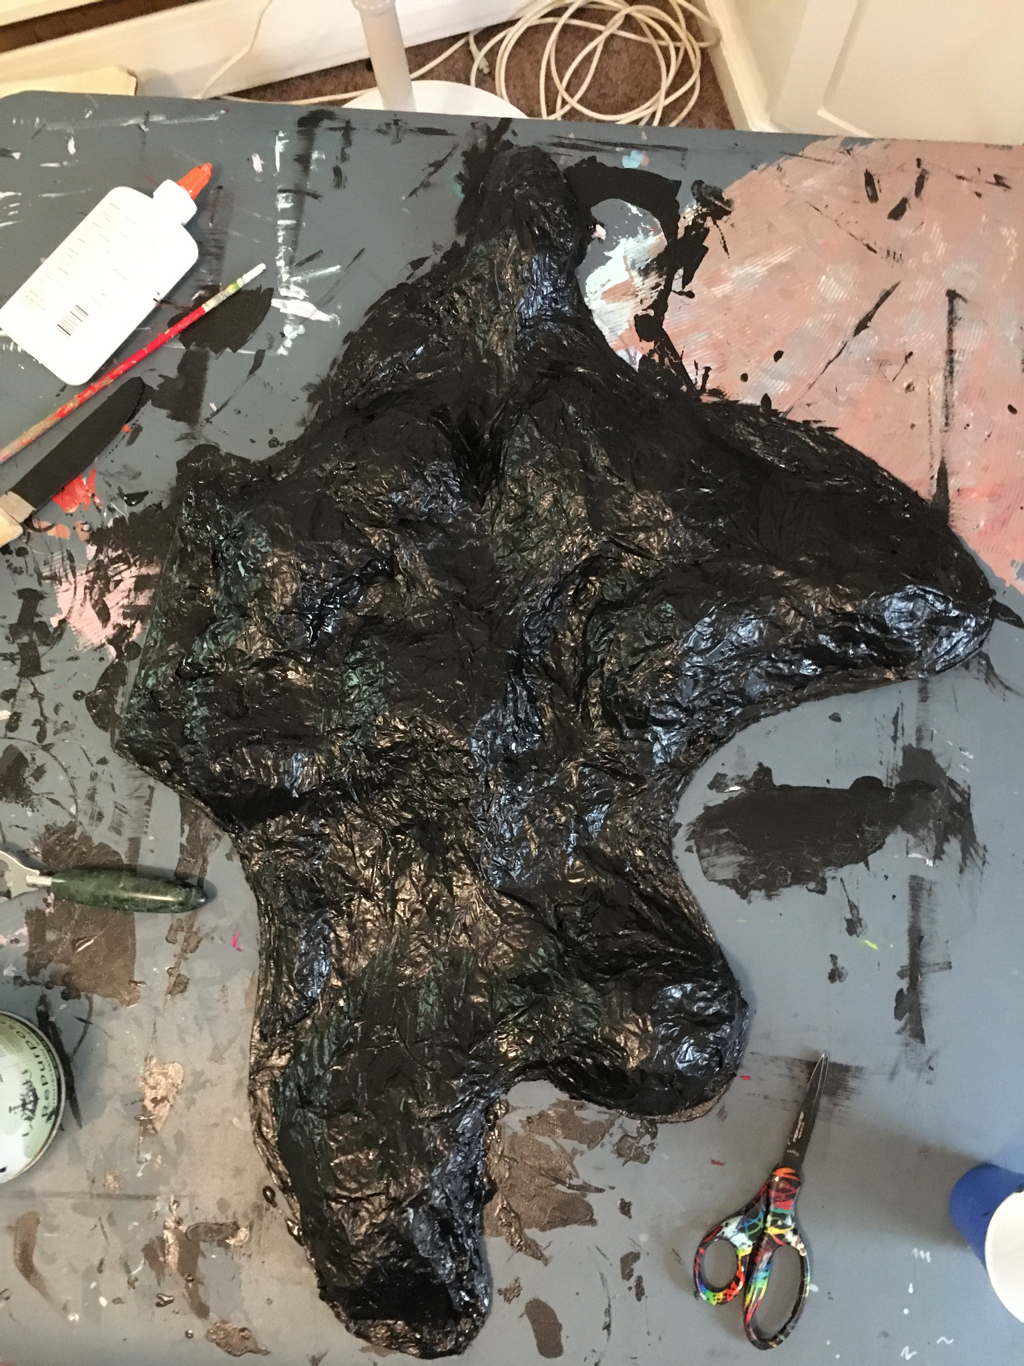
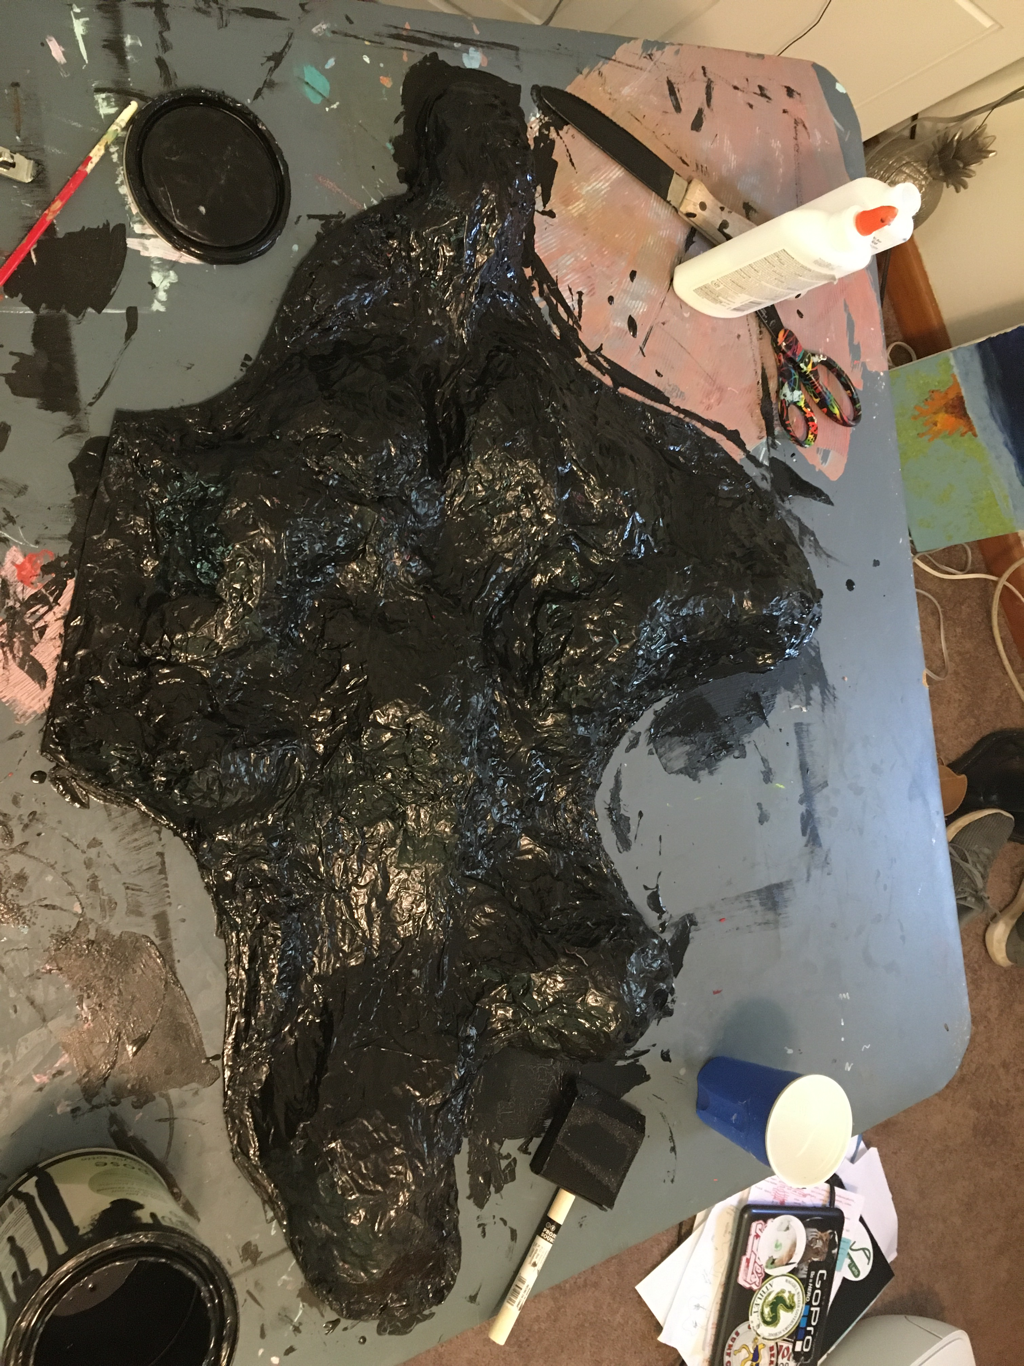
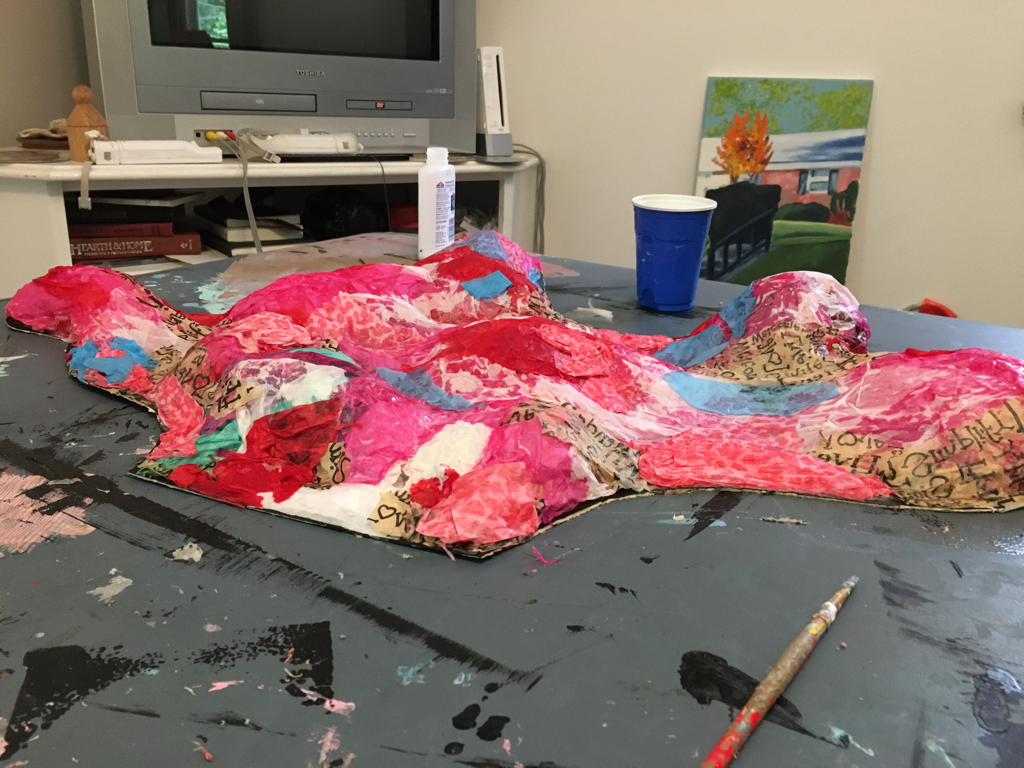
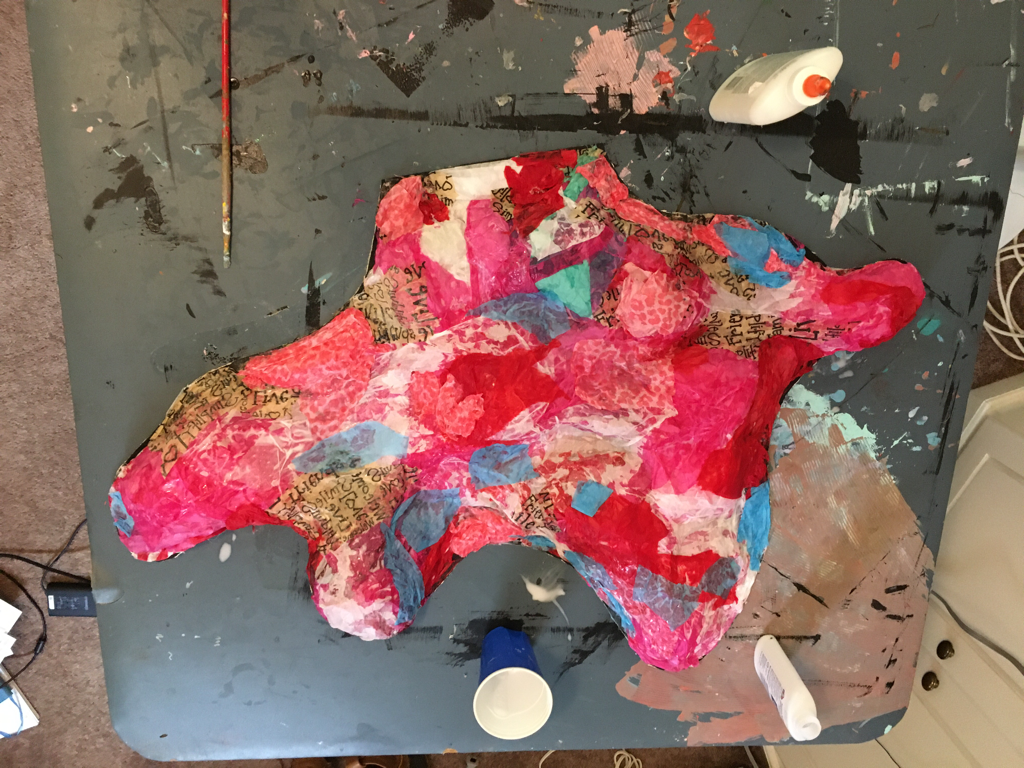
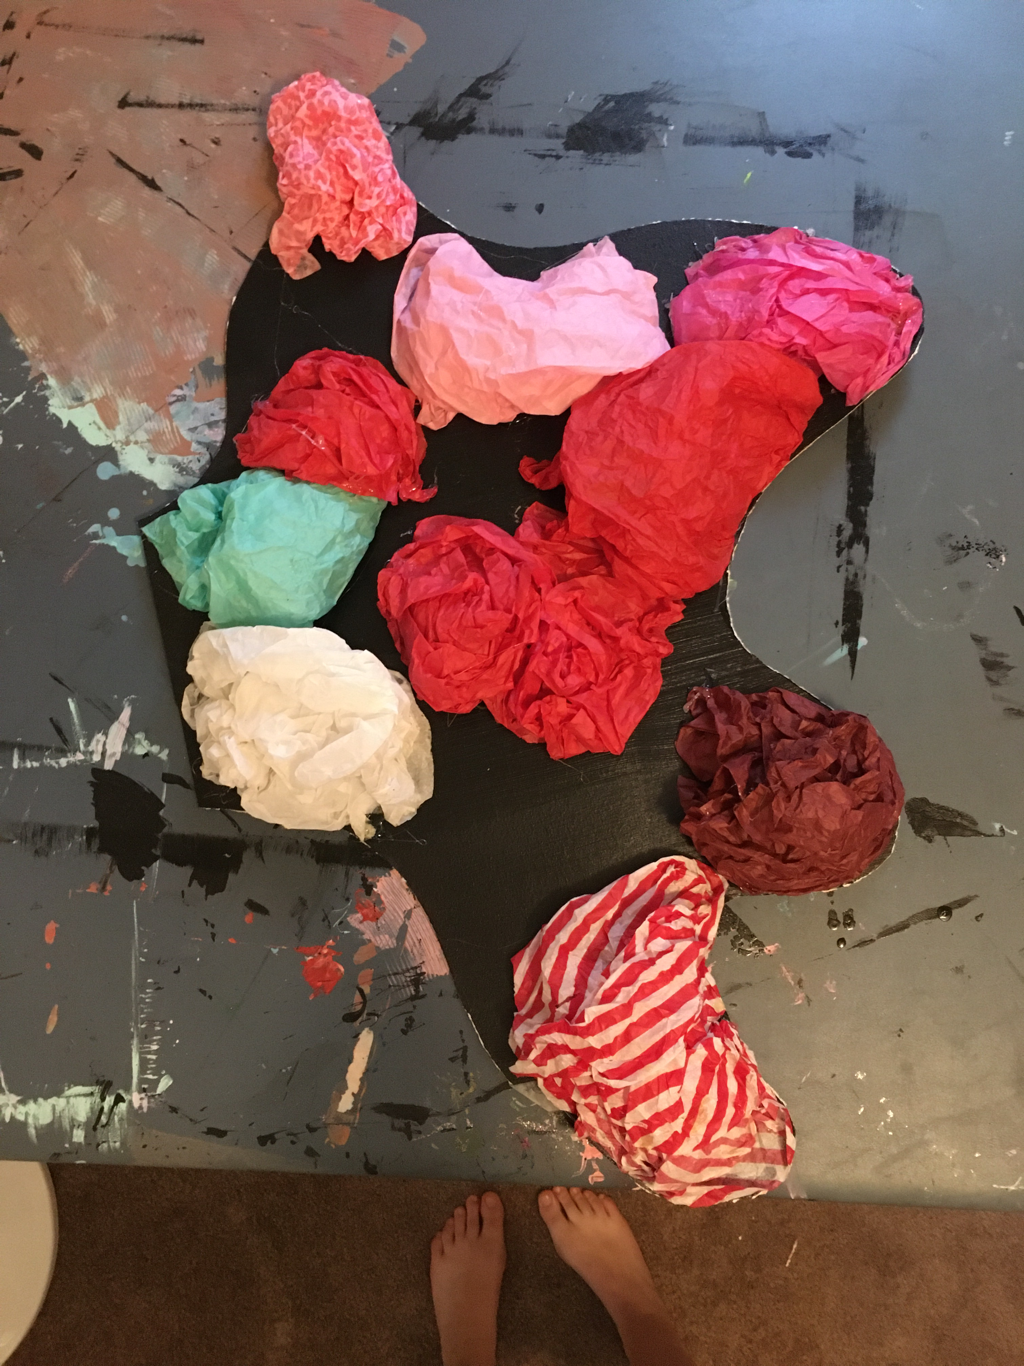
        The "head space" is complete! it took me a while to figure out the best course of action because I knew that I wanted it to be 3-D with some texture and form, but I also knew that my resources were limited; I wanted to find a happy balance of resourceful and competent. I ended up going for a sort of paper-mache technique . I thought about using playdough or clay and molding then baking it, but I figured that would be extra money and an extra trip to the store that I truly did not want to make. So, I rummaged through my hall closet and found our HUGE bag of tissue paper that we have accumulated from countless Christmases and birthdays throughout the years. I made the outline of the shape from two old pieces of mat-board I had spray-painted on one side. I taped the two board together and then cut along the outline I drew. It was actually kind of difficult to cut through the board, but I managed. Then, I mixed some liquid Elmer's glue and water in a small bowl. I found an old paintbrush and began applying the tissue paper. I started off with loose balls to form the crest-like places, and then I stretched thinner pieces of tissue paper as a sort of shell around the mounds so that they would hold their shapes. After that< i just began played strips of tissue paper and glue wherever I saw it. It was actually a pretty enjoyable process because I could see exactly where each piece would go and how it would fit into the overall shape. Plus, I liked that there wasn't any stress of not being able to go back and re-shape an area because i could easily add, remove, or change any addition I made.
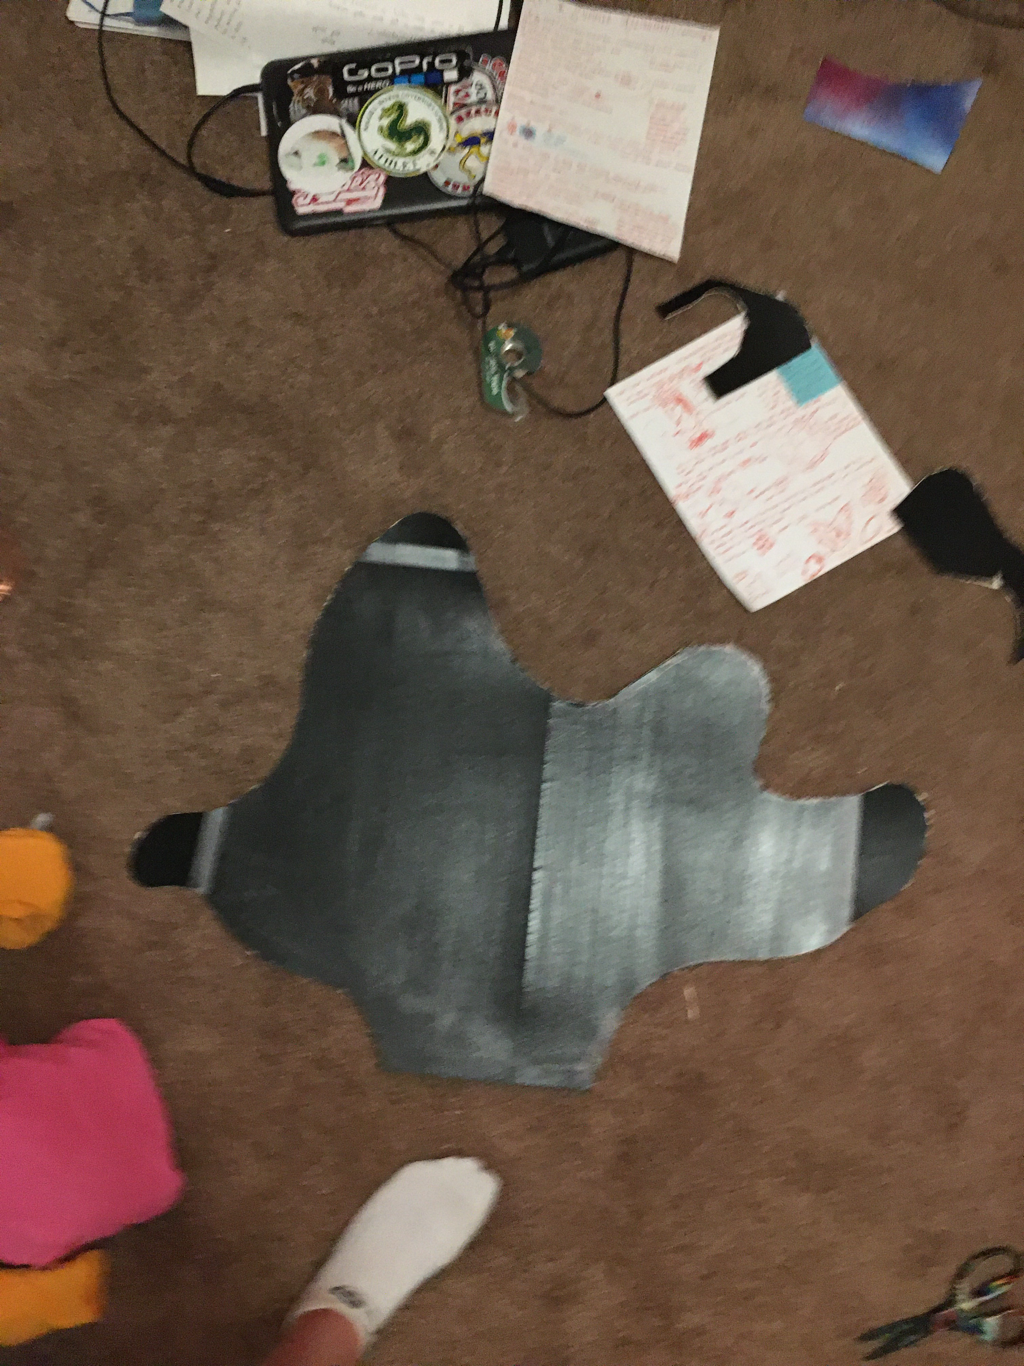
Once I was satisfied with the shapes and layers, i let the paper mache dry for a day so that it was sufficiently dry. I knew I wanted to make it all one color, but I couldn't think of any paint color I had in our little arts-n-crafts shelf that would cover all of the area. That's when I remembered the paint my mom was using to refinish our kitchen table. It was black and multipurpose -- plus, we had a LOT left over. So, I took the only larger brush I could find ( a sponge brush) and began painting. I started off with thinner layers at first because I wanted to cover every single crack and crevice. I ended up doing about three or four coats over the course of two days. Finally, I added a polycrylic protective finish to give it a nice glossy sheen. However, I noticed there was a problem the next day : the finish dried opaqued in some areas. To fix it, I went over just these problem-spots with the black paint, and then I did another thin layer of the polycrylic over the entire piece. Ultimately, i am very satisfied with how the head space turned out. I am excited to get started on the girl -- although I have to actually male a trip to the store before that happens...
0 Comments
Leave a Reply. |
Archives
March 2021
Categories |
 RSS Feed
